Posts Tagged ‘seasonal food’

How to Freeze All Those Damn Strawberries

Posted on June 29th, 2012 by Tonia 15 Comments


So. You picked like 400 lbs of strawberries and thought it’d be somanyfuns to wash them all, hull them all, dry them all, pre-freeze them all and then bag and freeze them all, right? ME TOO! We’re like twins! Ridiculously good-looking twins. Ridiculously good-looking twins who harbor tragically romantic ideas of what “preserving {like} 400 lbs of fruit” means in real life.

And now here we are, elbow-deep in red juice and running out of freezer bags and freezer space and seriously considering stabbing this paring knife into our eyeballs.

But at least we’re in this together! By the way, feel free to copy my perfect process, conveniently detailed below, but when all your friends ask you why you’re so awesome at freezing strawberries, make sure to credit me. A lot of sweat and tears went into perfecting it, so I want credit!

What you’ll need:

Not pictured: Freezer bags

1. Soak the strawberries in your sink {or, if you don’t trust the cleanliness of your sink, a large bowl} filled with lukewarm water and a splash of white vinegar for a few minutes, agitating occasionally to ensure that dirt and bacteria get washed off the berries.

2. Download and start an audiobook {or rather, your online streaming episode of The Bachelorette because whaaaaat is that Jef guy doing on that show he is way too cool for that kind of thing even though Emily is really pretty but I think she’ll probably pick Sean because he seems like her type, ya know?}

3. Transfer the soaking strawberries to a colander and rinse thoroughly under running water to remove the vinegar taste/smell.

3. Dry the berries off on a clean kitchen towel.

4. Spread the clean, dry berries on a cookie sheet and place in freezer for about 10 minutes or until berries are firm. Use this glorious 10 minutes of leisure to:

a) Make a milkshake from some of the berries plus vanilla ice cream

b) Yell at your laptop, “OMG Emily why can’t you see that guy is a total la-hoooo-za-eerrr! Why would you give him a rose gaaaaahhhh!”

c) Snuggle with the dog for a little bit

d) All of the above, clearly.

5. Put the firm/half-frozen berries into freezer bags and squish the air out of the bags as much as possible while sealing. Store the full, sealed bags in freezer until another craving for strawberry milkshakes strikes. Repeat until ALL THE THOUSANDS OF EFFING BERRIES are in bags.

6. Lose your mind, and blog about it.

Seriously though, a juicy audiobook aids in postponing the dissolve into strawberry-induced insanity. Get on that, for your own good {allow me to suggest Swamplandia! or Wild.}

Paella Party

Posted on December 12th, 2011 by Tonia 1 Comment

Our friends hosted a dinner party this weekend and made paella for everyone. Nothing tastes better on a cold winter night than a plate of spicy, smokey rice. The Italians have risotto, the Spanish have paella. Both are delicious and make it easy to feed a lot of people, so they’re perfect for dinner parties {or big Catholic families.}

We arrived early to help them mince the herbs, chop the onions, and get the fire started. Paella is traditionally cooked outside over a fire pit in a large, shallow pan. I wondered what the Spaniards would think of us, cooking paella this way in the middle of December with six inches of snow on the ground.

Folks started to arrive, and we all huddled in our coats and boots around the fire pit, watching the magic happen. First the pork, marinated in pomegranate juice and herbs, was browned in the pan. Then the garlic and onions went in, along with a healthy amount of oil. Then the sausage was added along with a big bowl of chopped watercress and other herbs. And finally the rice was poured into the mix and sauteed a moment before everything was coated with homemade chicken broth and hot wine, covered with foil and left alone to cook.

Our friends served the paella with a huge salad of greens, pomegranate seeds, and oranges. Dessert was homemade chocolate mousse, topped with whipped cream and homemade chocolate lace cookies. Everyone died and went to heaven. It was incredible.

Are you salivating yet? Good, because I really think you ought to make yourself a steaming bowl of paella tonight. Here’s a basic recipe, but you can get much fancier or creative with it if you’re brave. The meat is optional and flexible in this dish. We used pork loin and sausage in our version, because that’s what we have locally-raised and free-range around here. If you’re lucky enough to live near an ocean, by all means use seafood.

Cooking meals together is one of the most enjoyable ways to spend the cold winter months. This meal goes well with your most conversational friends and this song playing in the background.

Chicken, Shrimp and Chorizo Paella The Jewels of New York

serves 4

1 Spanish chorizo sausage, sliced
2 tablespoons olive oil
6 chicken thighs
1 medium onion, diced
2 garlic cloves, minced
1 tomato, diced
1 tablespoon flat leaf parsley, chopped
1/4 teaspoon spanish paprika
3 1/2 cups low sodium chicken broth
1/4 teaspoon saffron threads, crumbled
1 1/2 cups Arborio or other short grain rice
1 pound large shrimp, peeled and deveined
1/4 cup frozen peas, thawed
salt and pepper to taste

*special equipment: large paella pan or large shallow skillet

Season chicken with salt, pepper and a light dusting of paprika.

In a large paella pan, heat oil over medium high heat. Saute chorizo until browned and edges curl. Remove and reserve for later use. In the same pan, add chicken and brown skin side down until crispy but not cooked though. Reserve to the side.

Over medium heat, sauté onions, garlic and parsley until golden and soft. Combine rice and 3 cups of broth into mixture. Bring to a boil. Salt and pepper to taste and add crumbled saffron.

Add chicken, chorizo and shrimp and continue to simmer without stirring until the liquid has evaporated and the rice is cooked through, about 15 minutes. Cover with foil to ensure all rice cooks through. Finish paella by turning up the heat during the last bit of cooking, this gives a nice toasted rice bottom to the dish. Let the dish rest for about 5-10 minutes before serving. Stir in peas and garnish with parsley and lemon wedges.

{Images from The Jewels of NY blog}

Look What the Garden Gave Us

Posted on August 9th, 2011 by Tonia 4 Comments

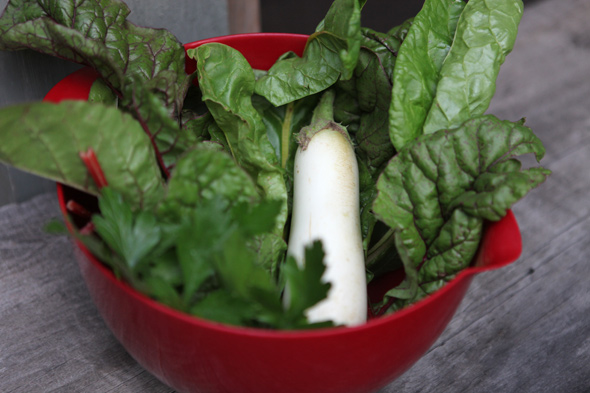
The first eggplant was ready for pickin’ yesterday evening, as well as a bunch of chard and some Italian flat-leaf parsley. What to do with these goodies?

I decided to make this soup with the chard and parsley, and these eggplant chips. It was all very tasty, hearty, filling, and flavorful. I love recipes that use staples from the pantry paired with fresh treats from the garden; No trip to the grocery store necessary.

First Summer Salad

Posted on June 22nd, 2011 by Tonia 10 Comments

Today we harvested salad greens from our garden for the first time this summer. They were so tender, so alive, and tasted like rain.

It has been raining here for days, and we are really starting to miss the sunshine. To lift our spirits a little, I made the most summery meal I could think of: Cherry-chipotle BBQ chicken sandwiches with homemade buns, corn on the cob, salad, and refreshing glasses of chocolate-mint water. Everything on the plate was delicious, but the dark green salad was definitely the “lagniappe”.

I used this recipe for the buns, and they turned out fantastic. Crusty on the outside, soft on the inside, golden, and yeasty. I made them a little smaller than the recipe recommends, and I ended up with 12 instead of 8. They were the perfect size this way, if you ask me.

For the BBQ chicken, I didn’t have a recipe. I had a bottle of this ridiculously good sauce, and a whole chicken from a farm nearby. It’s not often that we use “condiments”. Usually we make things like BBQ sauce, ketchup, and salad dressing from scratch {to avoid high fructose corn syrup and other gross ingredients that tend to be in condiments.} But this particular BBQ sauce happens to be really tasty, so we break our rule for it.

I cut up the chicken, put it {bones, skin, fat and all} into a dutch oven, and poured almost the whole jar of sauce over it. It cooked on the stovetop on very low heat for about four hours. I started pulling the meat off the bones at that point, removing the bits of skin and bones from the pot and leaving only the juicy, shredded meat. It cooked for about one more hour then, just enough time for me to get the corn and salad prepared.

The buns came out of the oven, the meat went on the buns, extra sauce went on the meat, the corn got a healthy slathering of butter, we tossed a few leafs of chocolate-mint {from our garden} into our water glasses, and the greens were tossed with oil, balsamic vinegar, crushed walnuts, and shredded parmesan cheese. Done! Such an easy dinner. So flavorful, summery, and satisfying.

Vegetables, including leafy greens, actually lose about 80% of their nutritional value after only about a week out of the ground. If we’re eating veggies that are being transported to us from far away, by the time they reach us we’re maybe getting 10-20% of the vitamins and enzymes that veggie had to offer. Just another reason why having a garden is so rewarding and worthwhile!

I tasted the sunshine and rain and life in our greens tonight…they were hugely different, more delicious, than anything we have ever gotten at the store. What a wonderful reward for all our hard work tilling, planting, watering, and weeding.