It’s a job that’s never started that takes the longest to finish.” — J.R.R. Tolkien
Do you exist in a pretty constant state of guilt and frustration about the fact that you live a life of consumption and waste? Do you feel like no matter what you do, you’ll never be able to change your lifestyle drastically enough to significantly reduce your impact on the planet? Yeah, well, join the club.
Mike and I live in the city + we have full-time office jobs + we don’t have a lot of spare time= we usually get through daily life doing everything as quickly as possible= we consume a lot, and waste a lot. Example: Instead of packing my lunch in a reusable container every morning, I quickly throw it into a plastic baggie and run out the door. The result of this behavior is a lot of plastic garbage, and a lot of stressful guilt…
So, about a year ago, we resolved to never throw away a plastic bag until it had been used so many times it had holes in it. We started washing out the baggies and sticking them right back into the “bag drawer” to be reused. The result has been amazing– I can’t even remember the last time I’ve had to put “Ziploc” on my shopping list. I feel really, really good about the fact that we’ve pretty much eliminated the unnecessary waste of baggies from our lives, just by changing one itty-bitty behavior.
I will be honest, though…plastic bags do not look cute sitting around all wet and crinkly on your kicthen counter. We needed a good way to dry the bags…and we don’t have a clothes line outside in the winter months. So, Mike came up with this really simple drying-rack {and it’s even cute enough to sit on your counter!}:
 Steps:
You will need: wood glue, 5′ of dowel rod {for a more rustic look, use sticks/branches}, a hand saw, a brace {pictured} or an electric drill, a scrap of wood slightly larger than the finished size {11″ x 3″}.
1. Measure a board to be 3″ wide x 11″ long, and cut the board to those measurements.
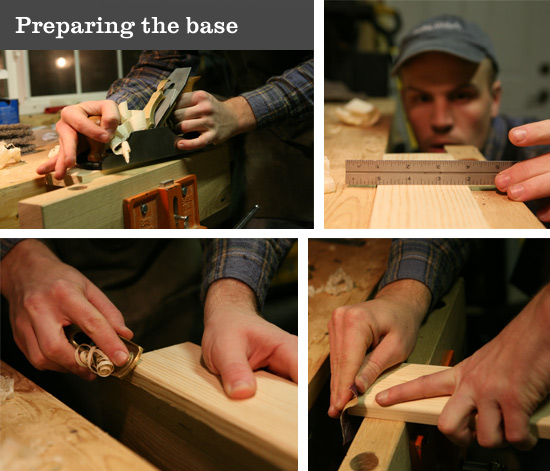
2. Prepare the base: sand/plane the board until it is level and smooth, take off any rough edges.
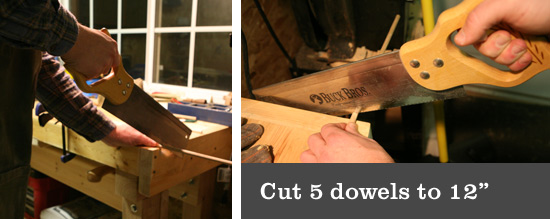
3. Cut dowel rods to five 12″ long pieces.
4. Measure & mark the spots on the base board where your dowel holes will go.
5. Drill holes into the base at the marked spots.
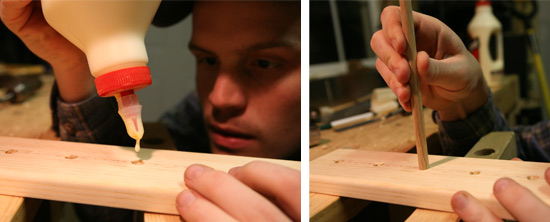
6. Drip wood-glue into each of the holes, and insert the dowels.
7. Let the glue dry, and then you’re all done! Start saving those baggies!


Love this!
This is BRILLIANT! Bill may or may not thank you for this, but I’m printing it and tacking it to his workbench TODAY.
I love you blog. That’s why I’m way back here at the beginning and moving forward…
also, Mike’s workshop apron-y thing is adorable.
He got the apron at Duluth Pack (www.duluthpack.com – definitely check them out, they have hand-made everything right here in Duluth for 125 years) back when he used to work there.
{Haha, I have been known to make fun of my fiance’s “old-fashioned” taste in clothing…even though I secretly like it when he wears things like this. Mike will be thrilled to hear that someone thought it was cute}
i reuse bags as well and merely put them over some other item on the kitchen counter/windowsill to dry – a milk bottle (being staged to go in the recycling bin) a wine carafe (that serves as double duty for watering plants) over the kitchen faucet (in the am when I return fromwork almost dry). thus one less thing to put on the kitchen counter. Don’t I see a white waterbottle in the dish drain ? use that for a baggie.
also I have not purchased green/white trash bags since I moved into my home in 1984 – i have a small kitchen basket that easily accommodates the size gotton at the supermarket (and I ask co workers to bring in theirs) and use these for trash. if I need a really bigger bag there are those that were saved from stores or I tie a knot in the bottom of a dry cleaner bag and use that!
Very nice! I currently use empty bottles.
I’m going to bookmark this as a project for later and maybe make a small mod: variate the position of the dowels by 1cm from the center line. This way, the opening of the bag can be pried open wider, which I think will get it to dry faster.
[…] make your handy husbands make you one of these! I know they’re handy. I have personally seen them make […]